How to use WiFi to connect your Android device to the Android Studio [Full Guide].
We have several plugins available in Android Studio, one of them is Android wifi ADB
I guess when you use usb cable to connect to your Android device, you get irritated. Isn't it such a hobby when you have to plug the usb cable in your system?
This article teaches you how to use WiFi to connect your Android device to the Android Studio.


Simply plug in your Android device and press the connect button. You can now do your testing by wireless Internet access or WiFi.

 That's what you did:) no cable needed any longer.
I hope this is a helpful article. If something is missing, questions or feedback, go ahead and leave a comment below. I would enjoy the feedback.
I guess when you use usb cable to connect to your Android device, you get irritated. Isn't it such a hobby when you have to plug the usb cable in your system?
This article teaches you how to use WiFi to connect your Android device to the Android Studio.

How to setup Android WiFi ADB plugin in Android Studio.
Setting up Android WiFi ADB plugin in Android Studio involves just three steps and they are as follow;
Phase 1:
In your new android studio project Go to File>SettingsPhase 2:
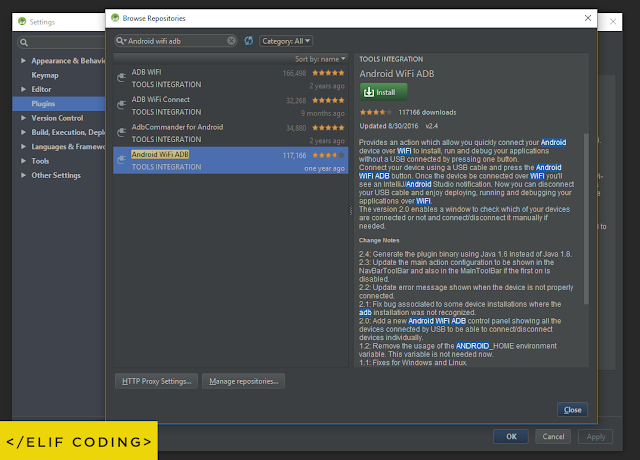
In the Settings page go to Plugins and Browse the repository and Search Android Wifi ADB and install it.
Final Phase:
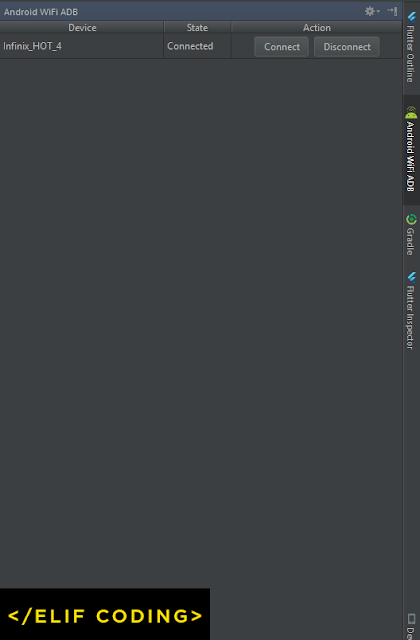
After Plugin is installed, restart your Android Studio and you can see the Android wifi ADB section on the right side. Now just plug in on your Android device and press the Connect button.Simply plug in your Android device and press the connect button. You can now do your testing by wireless Internet access or WiFi.


I hope this is a helpful article. If something is missing, questions or feedback, go ahead and leave a comment below. I would enjoy the feedback.


0 comments